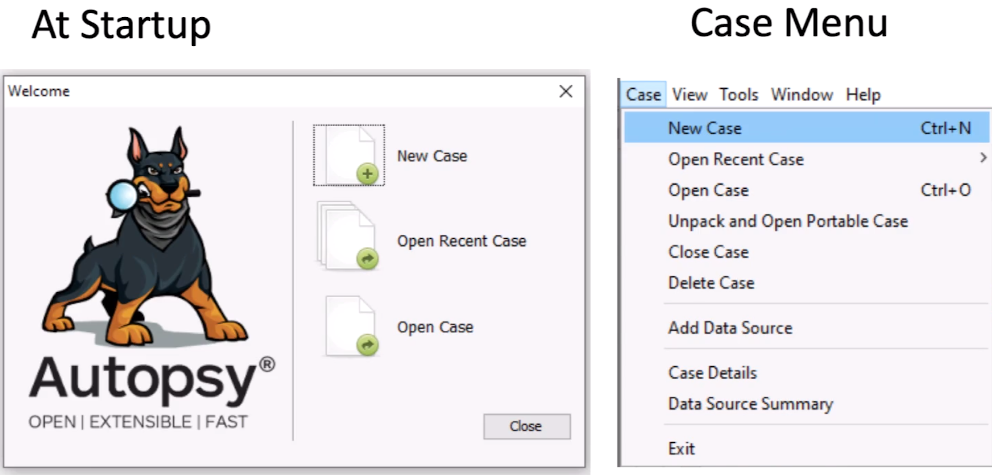
Making a Case can be done at Startup or via the Case Menu:
Course list http://www.c-jump.com/bcc/
Section Concepts and Goals:
Outline the basic ideas about organizing data into a case
Explain how to add data to the case
Creating cases
Adding data sources
Types of supported data sources
A case is an investigation project
A case groups the investigation data you are going to analyze
It's up to you how many cases you create:
By investigation
By host within an investigation
Factors:
Only one case can be open at a time
Reporting is done at a case-level
Cases are saved automatically -- there is no "save" feature
Making a Case can be done at Startup or via the Case Menu:

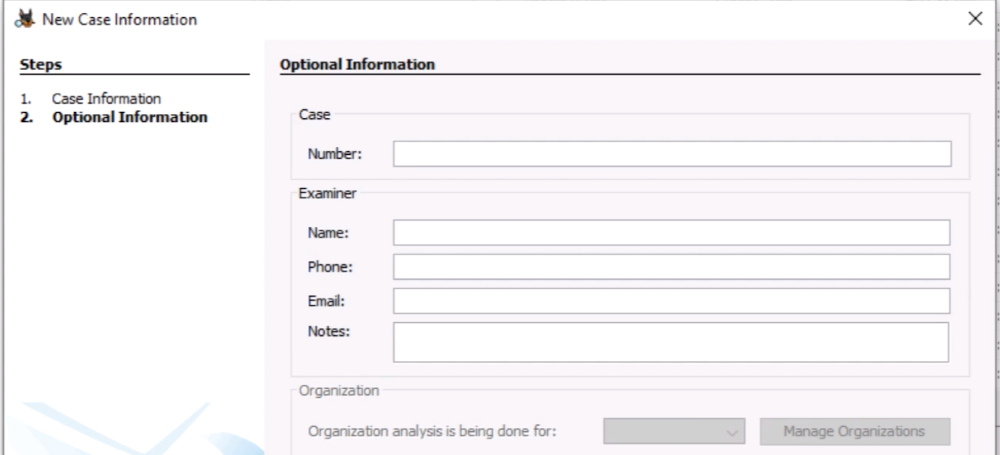
Creating a Case involves specifying New Case Information:
Case Name, Base Directory, Case Type: Single or Multi-user.
Case data storage directory path is constructed automatically based on the case info.

You can optionally specify other case metadata,
such as Case Number, Examiner Name, Phone, Email, and Notes:
Each Autopsy case (multi- and single-user) has a directory
Autopsy has a notion of a "base directory", for example
C:\CIT155\Cases
Autopsy makes a folder in the base directory with the case name, for example,
C:\CIT155\Cases\hw1
where hw1 was entered as the name of the case.
NOTE: In a multi-user cluster, all examiners need to have access to the case directory at the same network path, i.e.
\\server\cases\
autopsy.db
SQLite database that will store basic case info and data source info (unless it is a multi-user case)
Export Folder: Default location to store exported files
Reports Folder: Default location to store reports
ModuleOutput Folder: Default location for modules to write output to
It's the data that you want to analyze
Autopsy supports
Disk Images
Local Drives
Local Files (Logical Files/Folders)
Output from Autopsy Logical Imager
Unallocated Space Files (no structure)
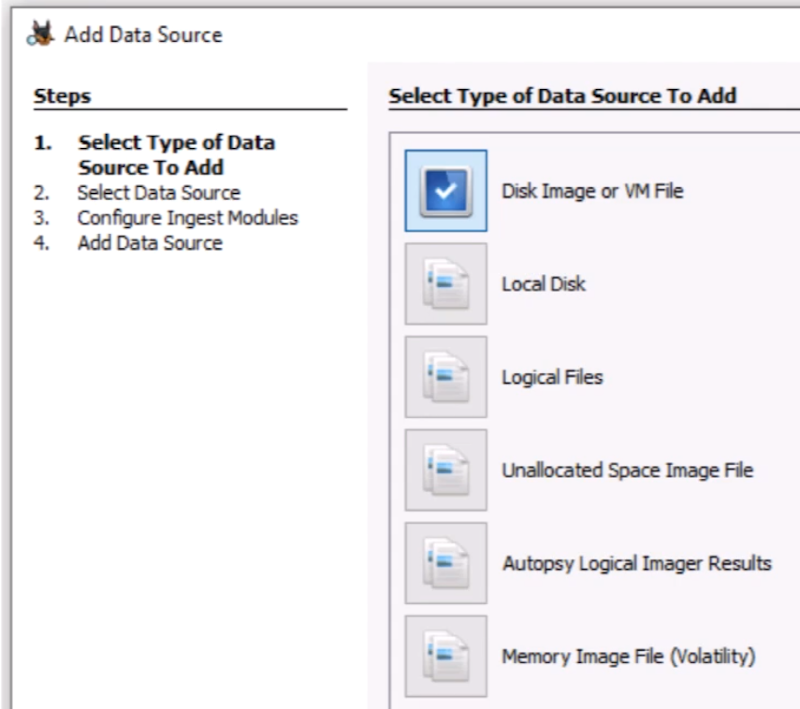
What happens depends on the data source...
The goal of this step is to populate the case database with basic information about:
The data source itself
Files inside the data source
Example:
Image size and name information added from E01 files
File system is scanned and a record is created in Autopsy database for each file.
There are lots of tables, but here are some examples
File Metadata
Name and parent folder path
Times (modified, created, etc.)
Size
MD5
and so on.
Partition layouts
NOTE: The database doesn't have copies of file content. Just metadata, so it stays fairly small.
Supported Formats:
Raw (dd) single and split
E01
Raw disk images of phones (Android)
Virtual machine formats
Process:
You point Autopsy at the first image file, it does the rest.
All it needs is the first image file, such as E01 -> E02, E03, etc.
Likewise, 001 -> 002, 003, 004, etc
Likewise, Image.bin -> Image(2).bin, Image(3).bin and so on.
NOTE: Autopsy does not validate E01 files integrity directly on import. The image has to be verified as a separate examination step.
Uses The Sleuth Kit (TSK) to analyze the contents of the image.
Detects Volume Systems that break the disk into partitions
Detects File Systems that organize a partition so that files can be stored in them
Volume systems organize the disk image into one or more volumes (aka partitions).
Partition tables are normally located near the beginning of the disk image.
Autopsy / TSK supports variety of DOS, GPT, Mac, BSD, and Solaris partitions
Autopsy will show areas of disk that are not in a volume (unused space):

Each volume is analyzed to look for a file system.
If no volume is found (partition-less drive), the entire image is analyzed for a file system (typical for Flash media)
File Systems allow files to be stored
Typically located at beginning of disk image or inside of a volume
Supported Formats: NTFS, FAT, exFAT, HFS+, IS0 9660, Ext2/3/4, YAFFS2, UFS
Orphan files are those that are deleted and no longer have a parent folder.
Also known as "unallocated" files.
In Autopsy they are accessible in the $OrphanFiles folder.
Finding orphan files in FAT file systems is time intensive.
Every cluster must be read and analyzed.
Can be disabled when image is added as data source to the case
Files associated with pictures, documents, executable files, etc. can be deleted by the user.
Carving recovers deleted files without relying on the file system knowledge.
Carving relies solely on the file structure internals. For example,
JPEG, PDF, Word documents, EXE files can be carved.
Carving is needed when the File System no longer has pointers to the file content.
file1.jpg before deletion:
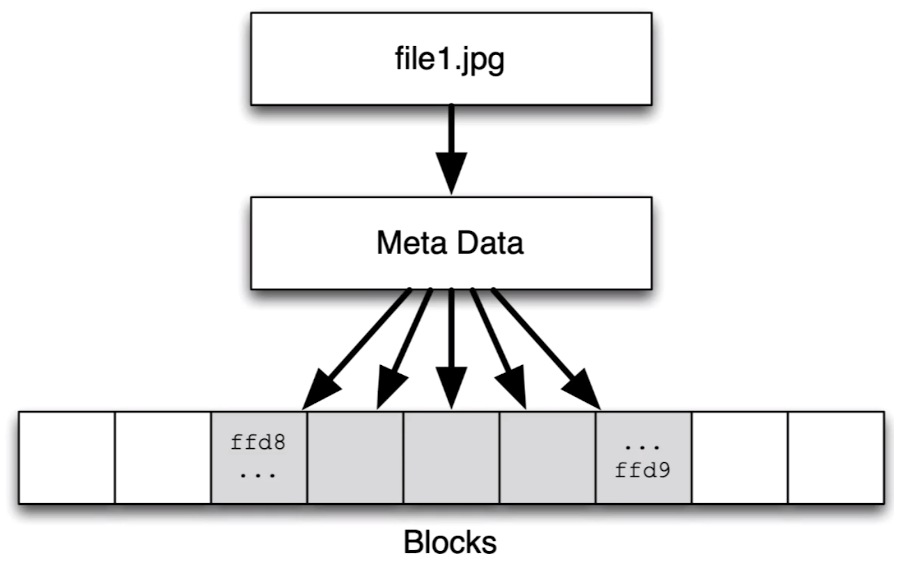
file1.jpg after deletion:
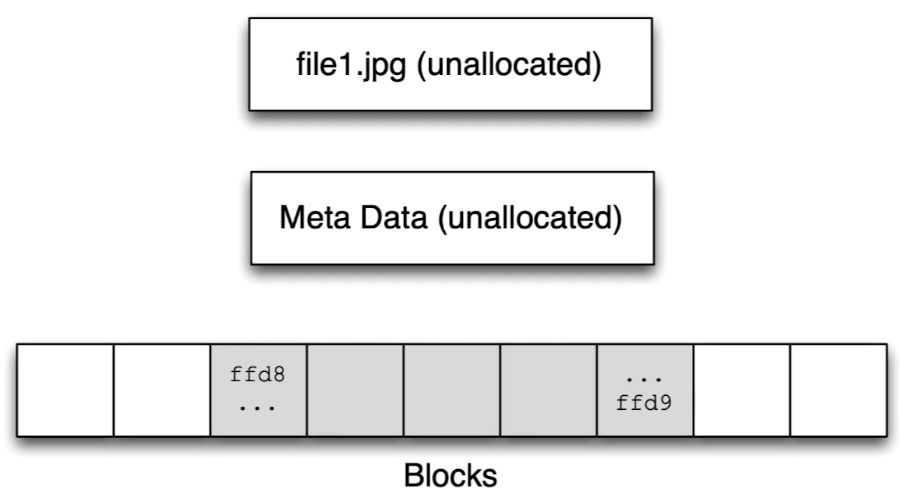
Scan each unallocated block to see if a file type starts there
When found, scan for a footer for that type.
More complicated carving scenarios possible if a file is fragmented on the file system
In most cases, carving starts and ends with data blocks containing file header and footer.
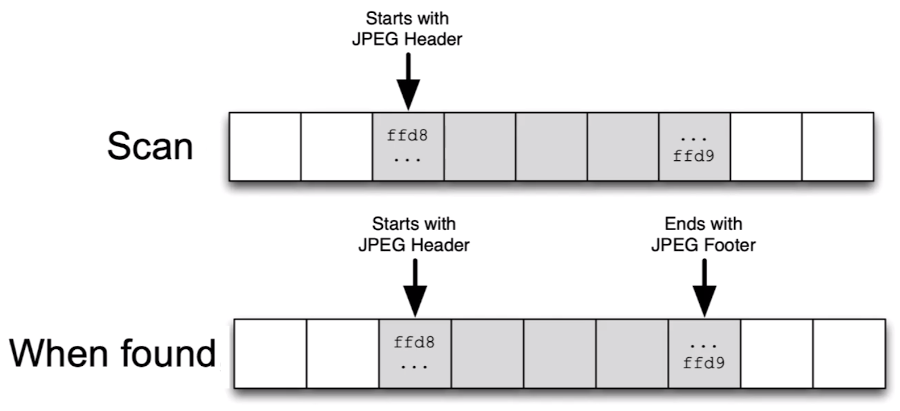
Autopsy includes PhotoRec - Open source carving tool.
It runs on unallocated space.
Carved files are added into a special $CarvedFiles folder.
NOTE: This is technically not done when the data source is added. Carving is done with the ingest modules.
Unallocated space in Autopsy is represented as files.
Directly in a volume or in a $Unalloc folder
Named based on:
Unalloc_ParentID_StartByte_EndByte
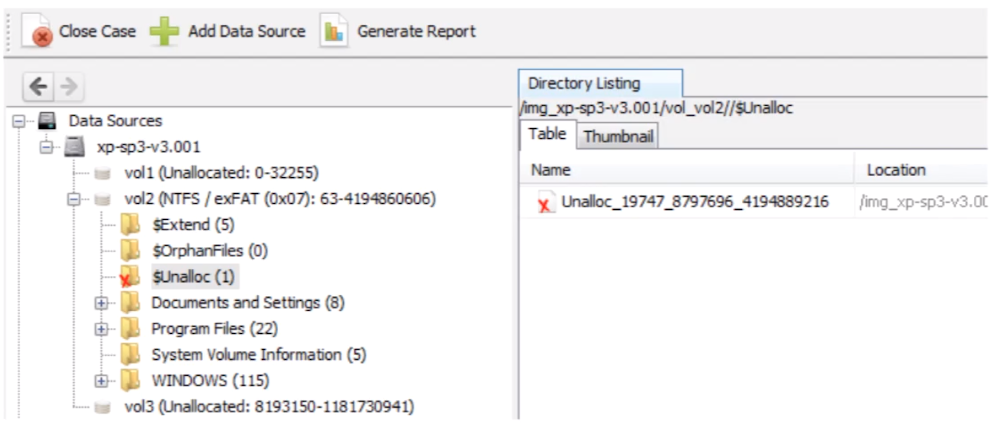
Add Data Source:
add Path - Ignore orphan files in FAT file systems - Time zone: (GMT-5:00) Amenica/New York - Sector size: Auto Detect
Hash values (optonal)
NOTE: These values will not be validated when the data source is added
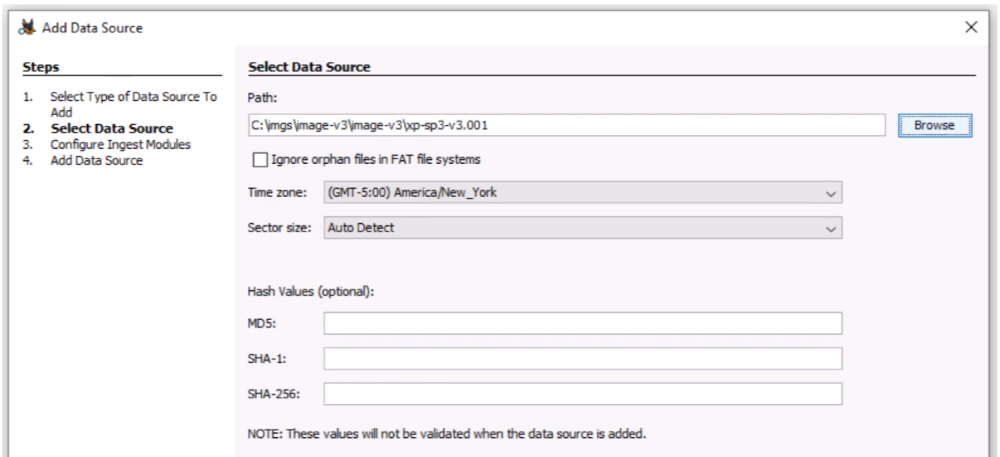
No RAID
No Logical Volume Management
No Bitlocker
Local drives are your C: or E: drives
You can analyze them:
Preview a live system (i.e. triage)
USB-attached device (optionally via write blocker)
Same process as disk images:
Scan for Volumes
Scan for File Systems
Add files to database
Will need to run as administrator to access all drives.
Analysis cannot be performed if USB device is removed
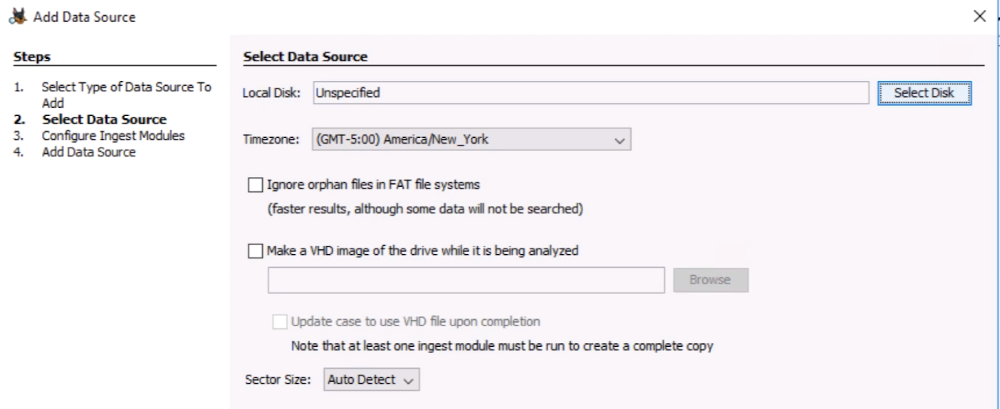
Making a VHD File allows to make a sparse VHD image for analyzing a local drive.
Useful for triage situations
When data is read, Autopsy determines if it has seen that sector before. If not, it saves a copy.
If you analyze the entire drive, you'll get a complete image.
We'll cover this more in the later Triage section
To make a VHD file in Autopsy:
Choose "Make a VHD..." option
By default it will pick a file name in the case folder
Choose the "Update Database..." option if you want Autopsy to update the case database to refer to the VHD file after it is complete.
Otherwise, it will have a reference to drive \\.\E: (or something similar)
Local files are those that are stored on your computer's file system.
Collection of JPEG files or Word docs, etc.
L01 files (logical evidence files)
Process:
User specifies file or folder to add
Folders are recursively added
Basic info about each file is added to DB
Times are ignored
Files are not copied or moved
Manually copy if they are on USB
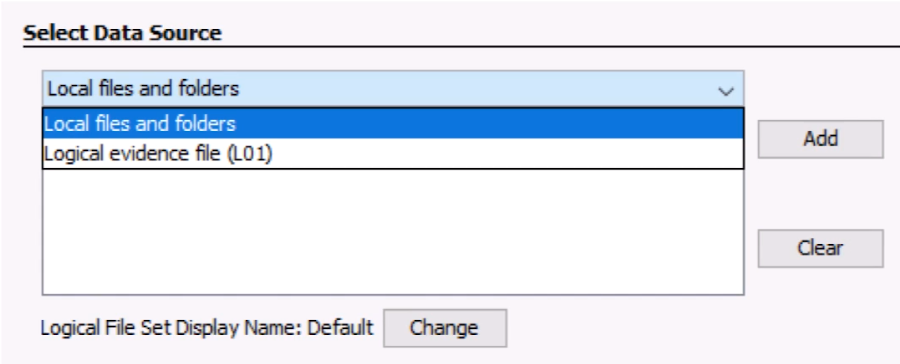
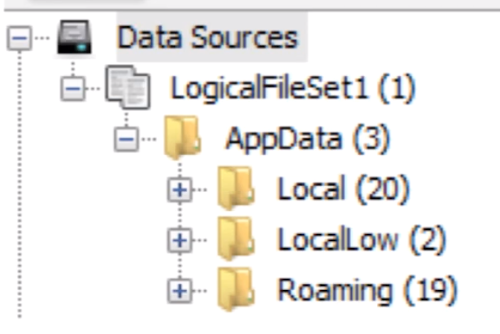
Local files added and grouped together in the UI by the Data Sources
Data sources are what you add to a case
Adding a data source means that its structure is analyzed and metadata is added to the database
Autopsy supports disk images, local drives, and local files